We began with our gesture warm-ups, completing
TEN 1-MINUTE poses, followed by
FIVE 2-MINUTE poses. I prefer for these to be done with a permanent media every once in a while so as to improve line quality.
We then drew
THREE 3-MINUTE figures - as exemplified on the left - utilizing 2 pastels (one light, one dark) to lay in shadow shapes and high light shapes. This results in a drawing with 3 values: a midtone, a shadow tone, and a high light tone. In this way we can quickly and gesturally convey a dimensional figure. This exercise can be completed in marker, but pastel is faster and easier.
Student Work:
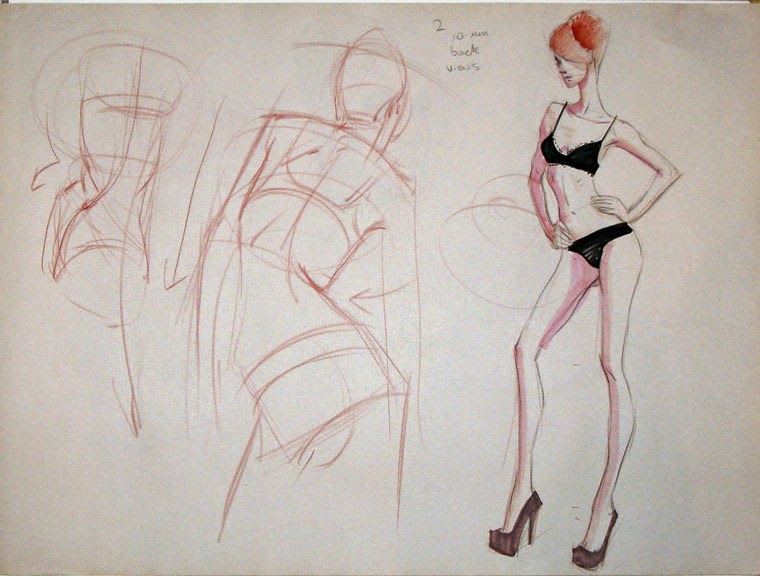
We then completed a
TEN MINUTE drawing (drawing on the right) using the above techniques: A light gesture drawing lay-in, a contour/continuous line drawing to flesh out the figure and add structural elements (face, hands, feet, anatomy), followed by the shadow/highlight tone lay-in, and shape/color block in for the bathing suit.
Student work:
Student completed the above study in pastel.
Student completed the above study in marker.
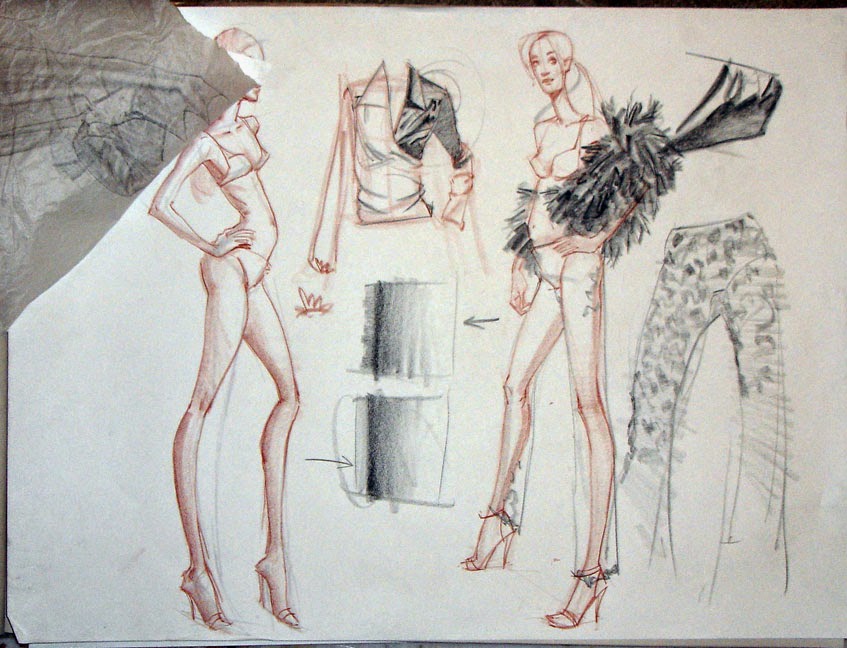
We then completed a
TEN MINUTE multi-tiered drawing, beginning with a figure in a bikini. Again, the sequence of steps was as follows: 1. Gesture drawing using fashion proportions; 2. Contour line drawing to flesh the figure out; 3. Rendering of the bathing suit to capture the reflective properties of the material. I gave the option of rendering it as charmeuse using the rendering technique taught by the illustration/design instructor or rendering it from observation.
On tracing paper we drew and rendered a
FOUR MINUTE silk nighty, again this was to practice capturing the reflective properties of silk.
We then drew another
FOUR MINUTE garment study over the figure, this time using a transparent robe.
We ended class with a class critique.